Wednesday, October 23, 2013

Smashbox HD Concealer Review

I am quite hesitant to do a review on this product because I know that It's not available locally,Or maybe I'm wrong but i believe you can avail this online so ill just do this if you have plans on purchasing.

I actually got it two weeks ago from an online seller from IG to be specific shes destashing her make-up or in other words yes! it's already used. But before anyone reacts let me explain myself, I believe that make-up products placed in a squeeze tube type of packaging is OK because they are not prone to bacteria or anything that can harm your skin since the previous user didn't dip her fingers directly to the said product.

This comes in a set for 700 pesos together with Nars Orgasm Illuminator and Smashbox Illuminating Foundation Primer both are sample sizes and already used.

PACKAGING:


For the packaging as I've said earlier it comes with this squeeze type of tube and the labeling is quilted that's why the writing doesn't fade as easily unlike the other products that I've tried. I believe mine is a sample size also but the regular tubes contains 8 ml or .3 fl oz just like the other brand of concealers,


 Consistency is very creamy which I love, doesn't have bothering scent to it and damn!!!! it blends like a dream and its so lightweight.

COVERAGE:

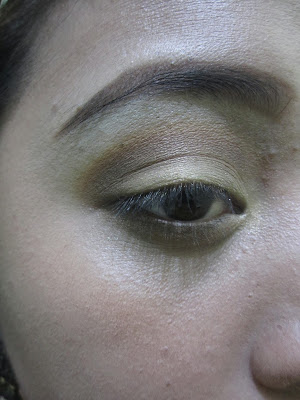
    With Concealer                                                         Without Concealer

This photo looks weird I know, but I hope you can spot the difference.

 MY THOUGHTS
  • I really enjoy applying this under my eyes because it blends well on bare face, it also brightens them and make me look more awake.
  •  I also applied this on the scars that I have on my cheeks but it didn't impressed me because it has a light to medium coverage. 
  • I also accidentally poke my eye with my mascara and my eye started tearing and the concealer creases like crazy that I have to apply another layer,
  • It sinks onto any lines that you have therefore I don't recommend this for older women who have wrinkles.
  • Doesn't breaks me out.
  • Longevity depends on the base that the concealer adhere to.
  • Looks great on photos
  • Blends seamlessly together with foundations.
  • Doesn't oxidizes like crazy and make you look like an oompa loompa after several hours, suits well with Asian skin tone.

Overall I believe that concealers should be full coverage since it's purpose is to cover imperfections, I really regret buying this although it's second hand, but at least I got the chance to try out higher end make up brand but really this product is depressing.

 I wouldn't recommend this guys I'm sorry if I let you down but especially with the weather that we have? there's no chance unless if your just gonna stay on an air conditioned room all day. Lastly this is only available online and I'm telling you it's expensive as heck. Now I know why the previous owner disposed it haha.  


Thursday, October 17, 2013

Masquerade Make-up Look

For some reason my Mother Fudging SD card is acting on me right now, I took some descent photos last night with my Masquerade look along with the tutorials, but my laptop couldn't read the damn SD card. But then again I'm still thankful that I took some Instagram photos with my cellphone duh! and decided to just use them instead of not posting my hard work.

One of the easiest look that you can put together this Halloween is the Masquerade Look, My local mall sells this fab masks for only 80 pesos so I am assuming that your's sells too. So buy your mask now and I have the make-up idea that will help you to look stunning even if your date removes that mask (cheesy statement right there I'm aware).  


  • Starting with primer i used Smashbox Illuminating powder to get that glowing from within look. 
  • For my foundation I mixed the Revlon Colorstay in Golden and Mary Kay Matte Liquid Foundie in Beige 2 to get the perfect shade for my skin tone.
  • Then I conceal my under eye area using my Smashbox HD concealer in light.
  • Set my foundation with powder, I used Maybelline pressed powder. 
  • for brows i used my trusty Mary Kay Brow Definer in brunette.
  • The eyes, I start applying a lighter purple eye-shadow on my outer V and smoking it with a dark purple eye shadow blending it towards half of the lids.
  •  Taking my gold eye shadow I place it on my inner tear duct and the other inner half lids blending together where the smokey purple stops.
  • blend and add till you get the intensity that you like and dont forget the lower lashline
  • Eyeliner time wing it out! apply a natural looking falsies (not the heavy ones) because we are wearing a mask, you dont want to feel uncomfortable right?.
  • contour and add blush but not too much, we want the eye part and the mask to stand out.
  • wear nude lips so your look wont be clashing with the mask.
  • Lastly spritz some finishing spray and your ready for the night, I used Mary Kay finishing spray from skindanavia
   
I really love this look and the mask is just stunning, I can use it as a decor on my vanity too. For product reviews comment below what product you want to go first and I'll gladly share them with you guys. 

Sunday, October 13, 2013

Deer Warrior Halloween Look (with tutorial)

Everybody was doing their Halloween make-up tutorial as early as the first week of this month, and I must not lie that I enjoy those tutorials. Lucky them they have the source or a place where to buy those prosthetic which made them so easy to create such outstanding and gory looks (jelly me), Since I don't have the privilege I decided to just use the make-up that I have and join the party because Halloween make-up is so much fun to do.


  1.  Starting on the first column left picture, after applying your full coverage foundation routine you want to make sure that you do your brows as straight and define as possible. It's easier if you put washable glue first and apply concealer to the excess hair then just copy Zachary Quinto's brows from Star trek.
  2. Make a fake crease, you can use brown pencil or brown eye shadow using a tapered brow brush from the sides of the nose to the upper part of your original crease area.
  3. Get a light brown eyes shadow and apply on the sides of the nose up to the starting line of the brows for definition and shadow.  
  4. Blend the fake crease that we did to create gradient effect and build the colors as you go till you get the vividness that you want.
  5. apply a shimmery white eye shadow all over the lid including the inner tear duct.
  6. onto the upper part of the fake crease, use a white eyeliner and draw ovals and fill them in, dont worry if it's not perfect just do this for fun.
  7. Use a gel liner to create a overly dramatic eyeliner on the top lash line, wing it out, and from the inner tear duct create a line until it meets with the shadow that we place on the sides of the nose.
  8. Using a black eye shadow create a haze under the eyes and just basically put it where you place the gel liner for that crisp and pointy look.
  9. Lastly just create cubes/square brown spots on the forehead and on the sides of the face
  10. ohhhhh and don't forget to apply nude lipstick.   


.

   And that's it for this look, see you on my next one.

Friday, September 27, 2013

My Current Skin Care Routine

I am now on my eighty first post since last year I started blogging, and I haven't really share even  once of my skin care routine/regimen. Maybe because it's too boring and I don't use expensive products that you guys might be interested with, but now I am finally doing this and lets get started.

Skin History- I have an oily skin type since puberty period but i rarely have acne or any skin problems (which I'm thankful) but i do have a problem in terms of black and white heads. I do sometimes experience pimples esp when I am lacking of sleep or I have my premenstrual syndrome. I also do wear make-up every single day (except for Sunday) that's why I really need a skin care in my life or else this face will be fudge up.

Make-up remover is a nightmare for me, I hate how it stings my eyes and the oil content doesn't feel right for me ( I just hate it). That is why I am used to washing my face and the product that I am currently enjoying is the Avon Naturals Sakura Whitening cleanser.  


First of all this product really smells good, it has a gel type of consistency and it has medium size beads that's serves as scrub as well. Pea size amount of the product and it will give you a really nice lather and removes any make-up easily including liquid eyeliner (yes! i kid you not). My skin is reacting really well on this product and I noticed a decrease amount of whiteheads around my nose but the blackheads are still there. 


I just took a photo from the internet cause mine are almost empty and i want to give you guys a descent one. 

I love this stuff after washing my face and patting it dry i use my Mary Kay Time Wise Moisture renewing softener, the formula is made for dry to oily skin and also suitable for sensitive skin. Fragrance and oil free and most of all it really removes make-up impurities. Leaves my skin supple, non drying and can be used as make-up remover (if your'e too lazy to wash you face) and a toner at the same time. i enjoy it so much and i cant wait for my second bottle.  

Lastly is of course moisturizer, I used Olay Natural White Light all in one fairness cream. This is what I always reach out every time I ran out of my Neutrogena-hydro-boost-gel. The scent of this one is amazingly good and most of all it's does not leave a greasy feeling when you apply it. It really does moisturize especially when i sleep on an air conditioned room. 

See how boring my skin care regimen is? I told you i don't use a butt load of product, but of course sleep and exercise does a huge participation on my regimen. I do Zumba two to three times a week and a day of bare face to let my skin breath.       


Sunday, September 22, 2013

Marina and the diamonds Inspired Look

I have been obsessing with Marina and the Diamonds songs lately,  and of course her make-up look and style. Her look is inspired with a combination of Marilyn Monroe, Madonna and a pinch of Marie Antoinette- very glamorous and very 60's, and of course her signature heart mole on the cheek bone and lashes on the lower lash line makes me wanna re-create it. If you wanna know more about her just read her interview from Glamour Magazine.


 Oh my god Isn't she beautiful?

Numbered Shadow shades that I'm working with
 
  1. For easier application use a tapered crease brush to achieve the perfect shape and apply the first shadow there.
  2. Second shadow apply it on the crease as well blending with the first shadow that we apply earlier.
  3. third color slowly work it on the outer crease blend together with the two shades.
  4. fourth color place it on the center lids.
  5. place the fifth shade on the inner corners for highlight.
  6. lastly apply the last color as highlight on brow bone.
  7. Line your eyes and extend the wing.
  8. curl lashes and add mascara include the lower lashline
  9. apply falsies and demi lashes on lower lashline
  10. lastly to achieve her signature look draw a heart mole on the right cheek bone.

Werk it girl for instant thin face lol
  • Since I have a round face I contoured the shit out of it and applied a matte pink blush, I also used highlighter 
  • for my lips I use a pale pink lipstick and we are done.

Product's Used

Revlon Colorstay liquid foundation
Maybelline pressed powder
Elf blush and bronzer
Mary Kay Liquid Eyeliner
China Brand lashes
DIY demi lower lashes
Maybelline Lipstick in Make me Pink


Friday, September 20, 2013

Edgy Grunge Look photo Tutorial

For a change here's an edgy grunge look photo tutorial for my ladies who's going out for a drink this weekend if this looks appropriate for a night out lol.
 
First excuse my brows on the next photos because I'm trying to let them grow first and re-shape them tee hee. Also photos are taken inside the house with fluorescent lighting so sorry if they look crappy. 

 After priming my lids I take this deep brown shadow and place it on my crease slowly blending it's way in.

for my hooded eye-shape ladies you wanna make sure that you place your eye-shadow like a C shape so it would compliment your eyelids and not looking too trying hard to wear shadows.

Taking this warm orange-y color were gonna place that on the crease as well.

 This time make sure that the two shadows blend together nicely and build up the intensity of the warm orange shadow to act as an ocher haze on the crease,

take whatever gold frost shadow you have and place it on the center lid and on the inner tear duct as well, mine has to be this pigments from careline. 

Blend the shadows really well and place the same two shadows on the lower lash-line, build up the color like we did on the crease.


Highlight the brow-bone and blend.

Line the upper lashline with liquid eyeliner and the waterline with a black kohl eyeliner, curl lashes add falsies of choice and mascara. 

 I added a refined wine shade of lipstick to complete the edgy and add grunge for this look.

I also did some contouring and higlights,

 This would look fabulous if I use frost on the center lids. i think i have to shop for more make-up because I love doing this kind of post.


Products Used.

Revlon color stay liquid foundation
Revlon age defying concealer
maybelline pressed powder
Elf blush and bronzer 
Mary kay highlighter
Mary kay brow definer
Cheap China lashes and lash grip
Maybelline The falsies mascara
Maybelline Lipstick in Refined Wine


Flash Back Friday: How Am I Introduced to Make-up

It's been five days since the last time I updated this blog and I know I must not just leave it hanging once again. I was actually planning to make a Make-up photo tutorial to keep up with you guys since my last post was just all about a finished look (That could have been perfect for Halloween), So since I couldn't do it as of the moment (because i have a conflict with mah huuuurrr) I have something to share.

I'll take you down memory lane, 
Every You-tuber, beauty bloggers has their own story on how they were introduced on what they are doing right now. For me it all started way back 2007, I am working as a Sales Clerk from a fertilizer company and yes I go to work without any make-up on (I didn't even know they exists or if I do, I didn't know how to use them) except for the lipstick and black kohl eyeliner which I own from Ever Bilena that time. Then one day I was browsing you tube to kill time and stumbled upon this video.

Due to slow internet connection I couldn't upload the said video so here's the link instead Basic Smokey Eye Turotial

Yup! the Michelle Phan that you knew today, I was so happy that this specific video is still up on her channel which I subscribed up until now.

The first video that changed my whole (makeup) life, the woman who introduced me to eyelash curlers, mascara, nude lipstick and almost everything make-up related, i ended up seeing myself swooning to her channel up until now. Since then I always purchase make-up products as if they're a basic necessity to a humans life.

 I was so inspired by her but not to the extend that I make my own beauty channel on YouTube (I am not that confident) but instead i did this blog last year because I've noticed that blogging is a better way to share your passion without blabbing in front of the camera and being judged.

Nowadays this passion/hobby became a life changing to everybody not just to the bloggers/you-tubers but also to the companies and sellers who introduce their product through beauty bloggers. Some earn money through this and it became a job for them, And like Michelle she now owns her very own make-up line and became very popular.

Thank you Michelle for Inspiring us! you may not know who I am but ill be forever grateful. 

How about you? would you go back and let memory lane take-over?